Ghost mannequin, also known as invisible mannequin, is commonly used by brands and retailers to give their product images a more professional touch. Unlike traditional mannequin, ghost mannequin can shoot obscured details. This comes in particularly useful when it comes to shooting more elaborate pieces such as blazers, dresses and shirts.
Flat-lay causes your apparel to crinkle up easily as they are not conforming to any body. This disrupts your potential customers from being able to understand your product accurately and prevents your products to appeal to them appropriately.
On the other hand, not only are traditional mannequins visually intrusive, they also block out details that you might want to show such as inner collar, stitched brand logo and jean hems. Traditional mannequin also prove to be challenging in the post-production stage as it will require tons of effort to Photoshop away the mannequin.

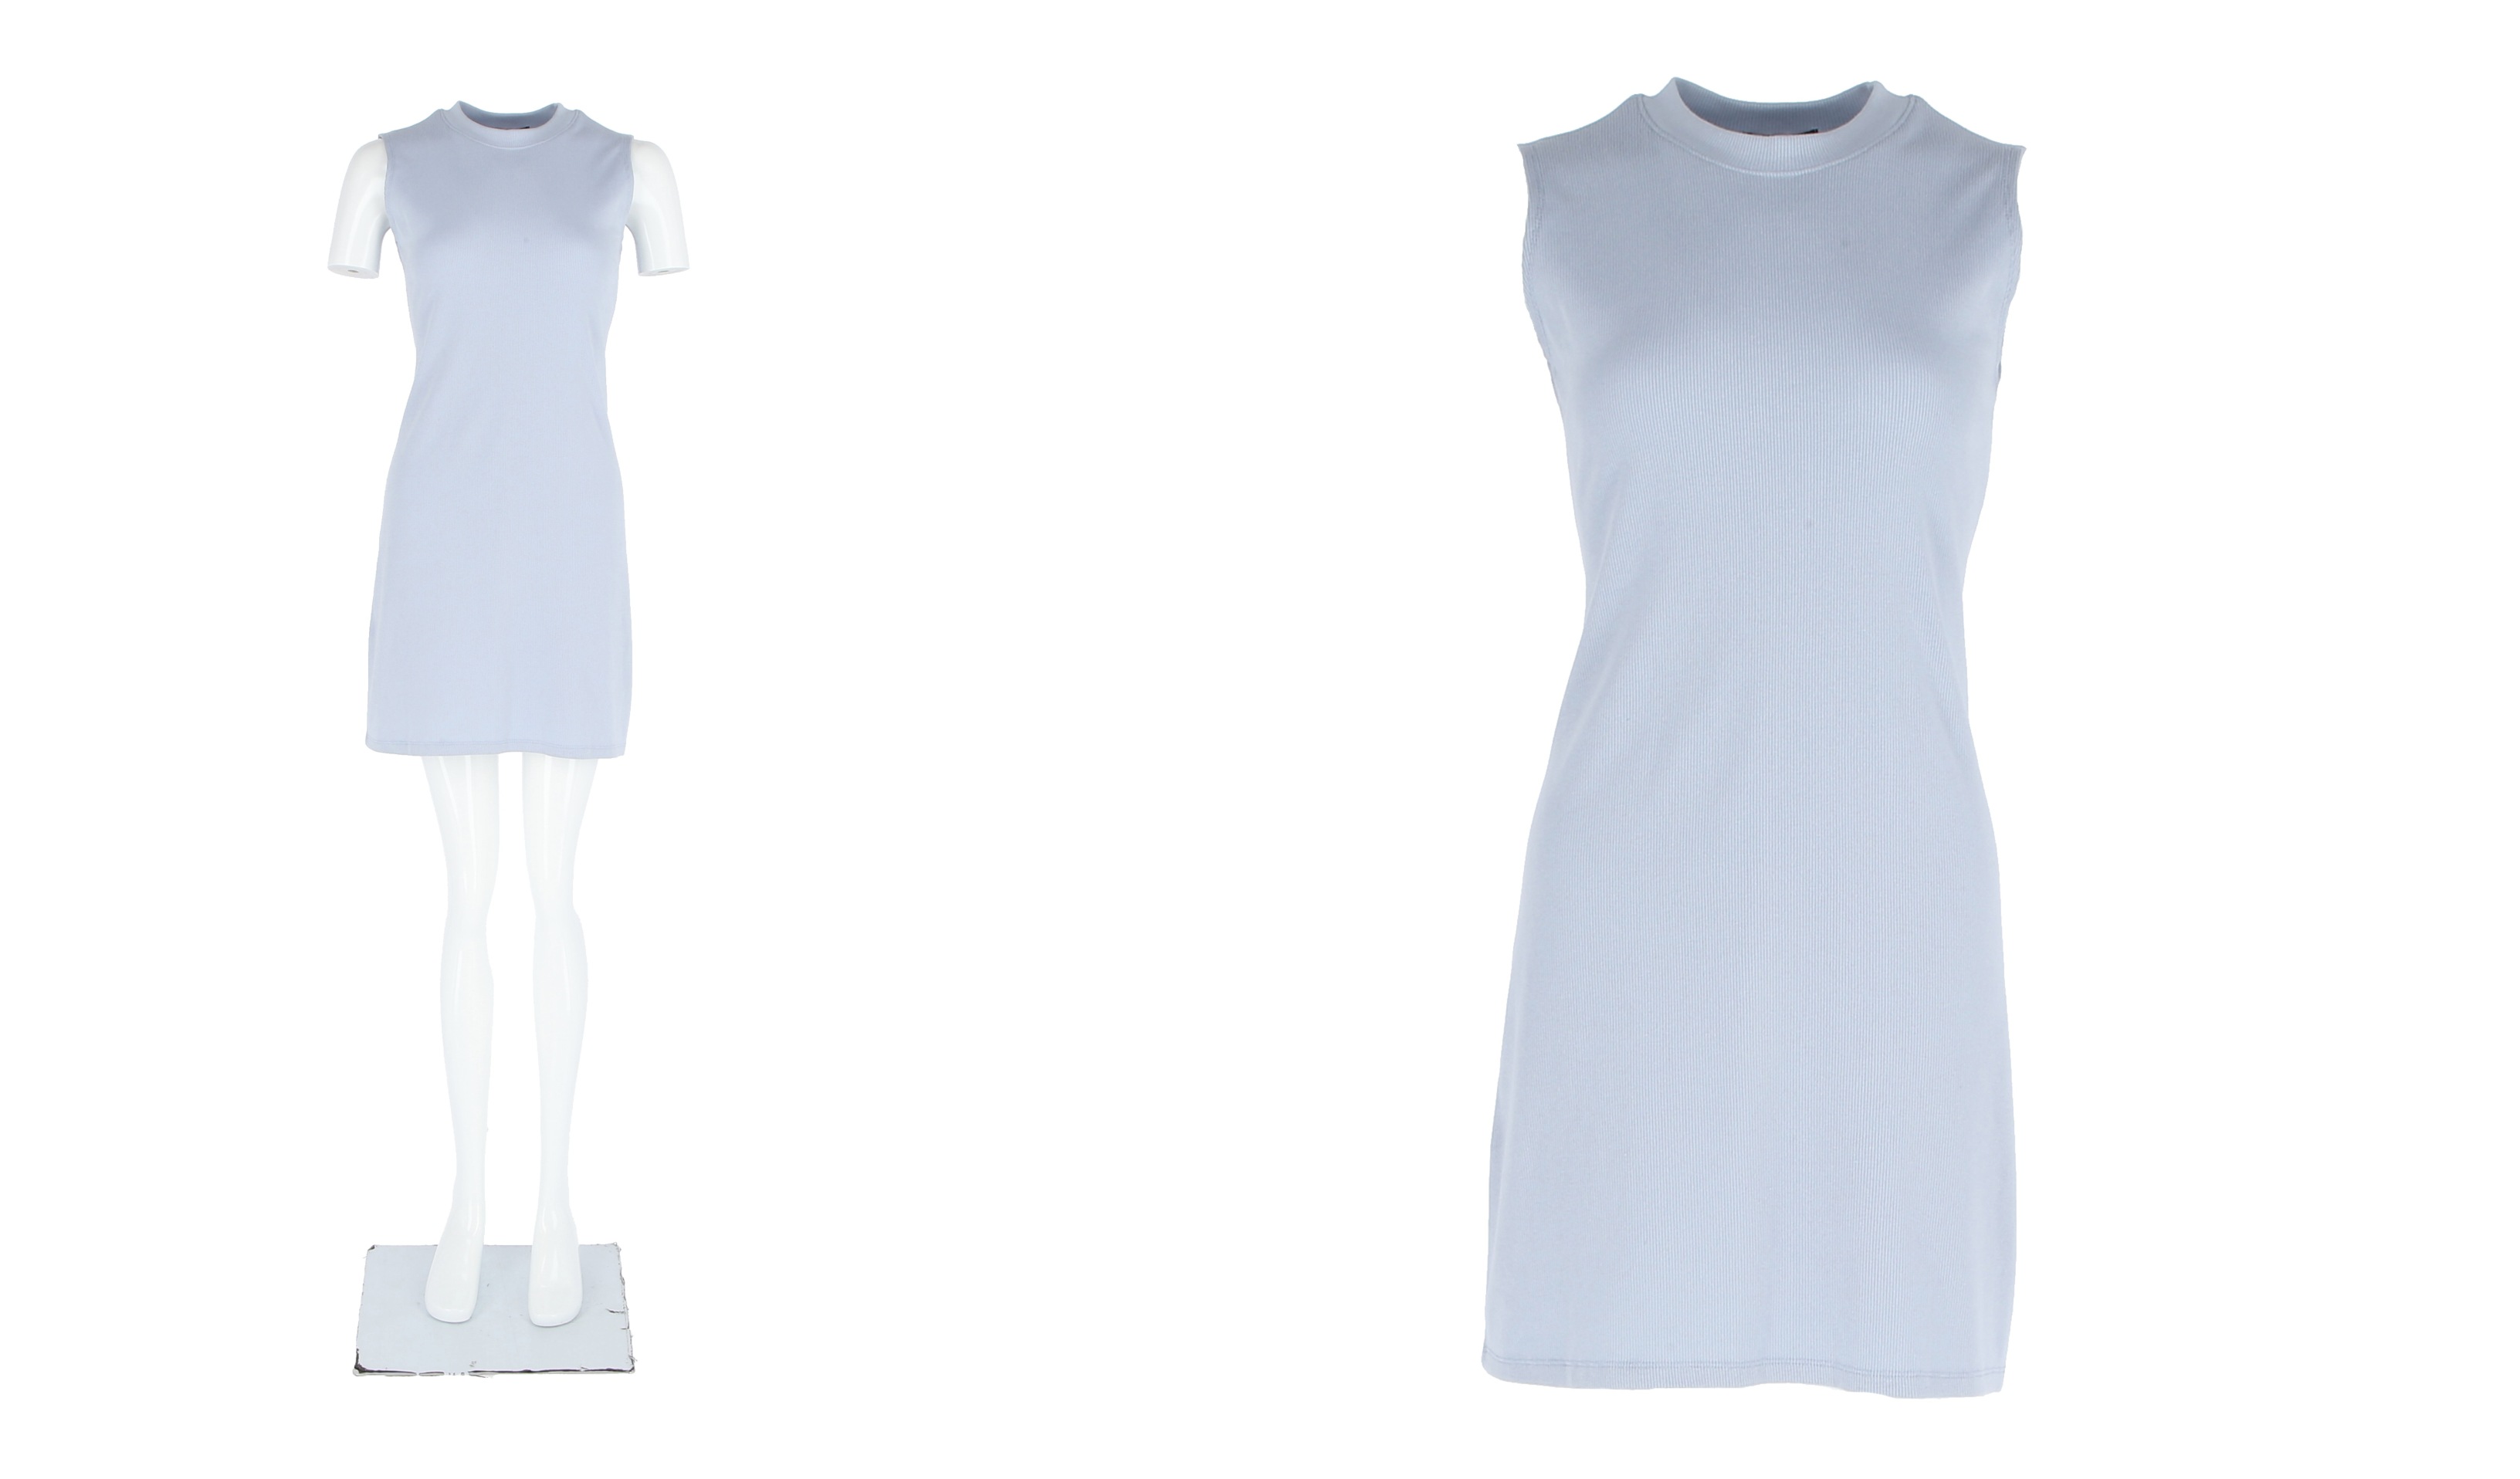
The above image (right) may seem complicated to achieve. The mannequin is missing from the product image, yet the clothing seem to be fitting a mannequin nicely. Usually, it is impossible to achieve this effect with traditional mannequin and would need professionals to engage with a great deal of post-processing.
However, with ghost mannequin, you can show the inside of Photoshop. This is why many brands prefer to shoot using ghost mannequin because not only shooting is easy, but convenient as well. In order to create the ghost mannequin 3D effect, it is important to know how you need to photograph your product so that you can spend more time on styling rather than figuring out the ghost mannequin. Here’s how you can create the ghost mannequin effect using Pruto Imaging’s ghost mannequin and ORBITVU products:
1. Choose your mannequin pieces

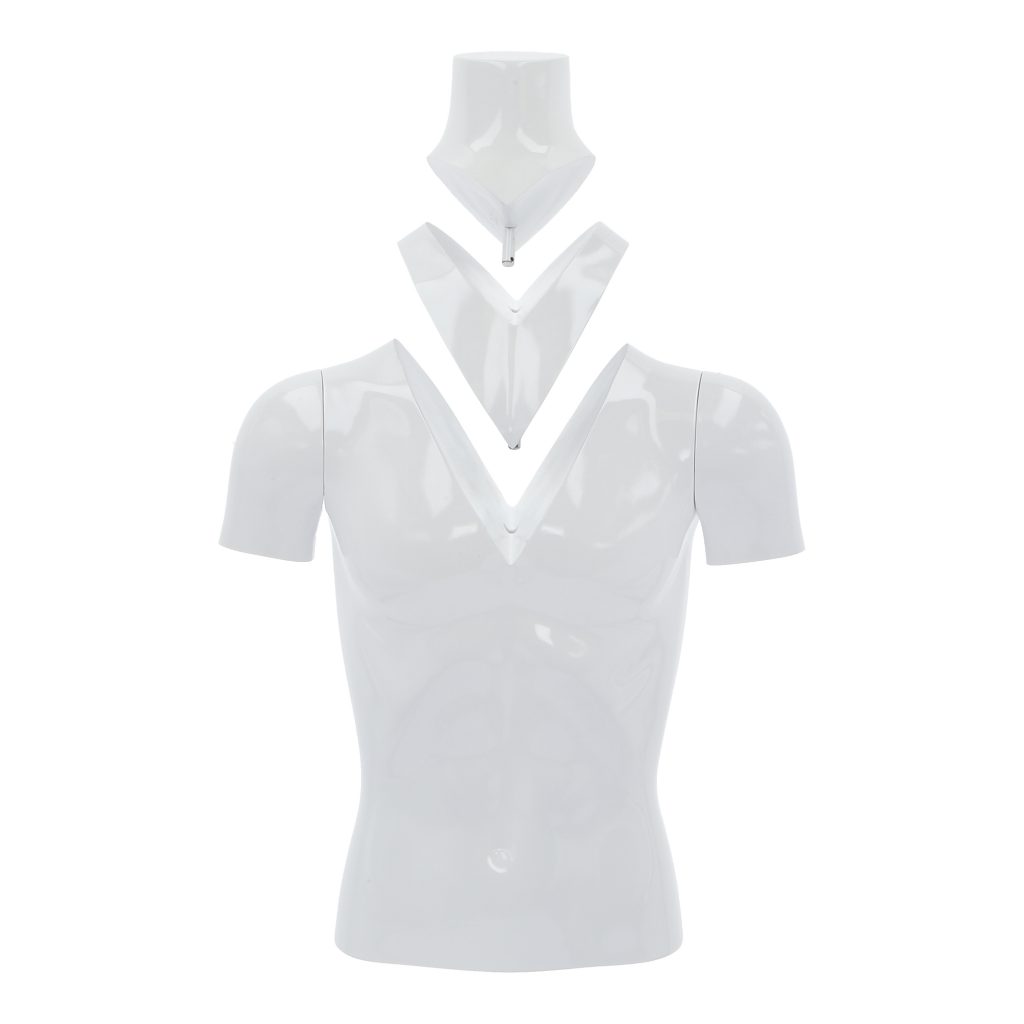
Ghost mannequin comes in different detachable pieces, including arms, neck and upper body. Make sure to select the modules you want to use and remove. For example, it is important to show the lining of a blazer in E-commerce platforms. You could remove the V-shaped chest piece to showcase the intricate details of the blazer better with ghost mannequin.
As the arms come in different lengths, they can be easily adjusted to fit different sleeve lengths. Just remember that you want to carefully select modular pieces that would be the most flattering for your apparels.
2. Setup and Equipment
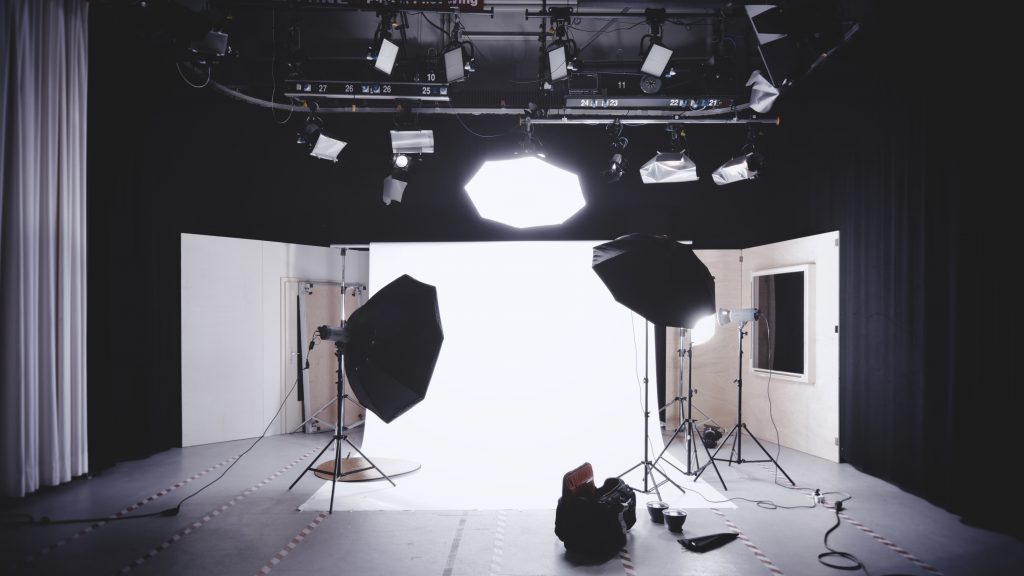
To achieve high quality product images, you will need good camera, lighting equipment and backdrop. White background product images is the gold standard for E-commerce because of its consistency and clarity – you can learn more about why white background photography is important in E-commerce here.
3. Photographing your garment
Set up your lighting and exposure so that it highlights the features of your garment. For apparels, it is important to position your camera directly level with the chest area so that no sides will look disproportionate. In E-commerce, your customers would be looking for accuracy and clarity. Photographing a product from an angle that is too high or too low will cause your garment to look tapered and inaccurate. For most brands or retailers, the minimum requirement for product images would be one front and back shot. But this is not a rule – get creative and think of various angles to showcase your garment.
Tips and Tricks
- Tape: Gather the hems of the shirt or dress and use sticky tapes such as masking tape that holds fabric together. Tapes, rather than pins or clips, do not leave markings on your fabric and looks more natural
- White paper reflector: Sometimes the buttons on your shirt might reflect image from your surroundings. To prevent having a weird image appearing in product image, use a plain white paper as reflector to remove unwanted images.
- Transparent rod: When you want to shoot hoodies, you could always used a transparent rod and attach it to your mannequin. This acts as a temporary stand that supports the weight of your hood.
- Styling: Always remember to shoot at least one front and back shot! Consider playing around with different angles to showcase the unique points of your apparel.